Earlier this month, some of the TILE team spent a morning in the Science Building on the Stoke Leek Road campus with Senior Lecturer Edward Stanhope, filming some instructional videos on how to use the Green Screen teaching delivery room.
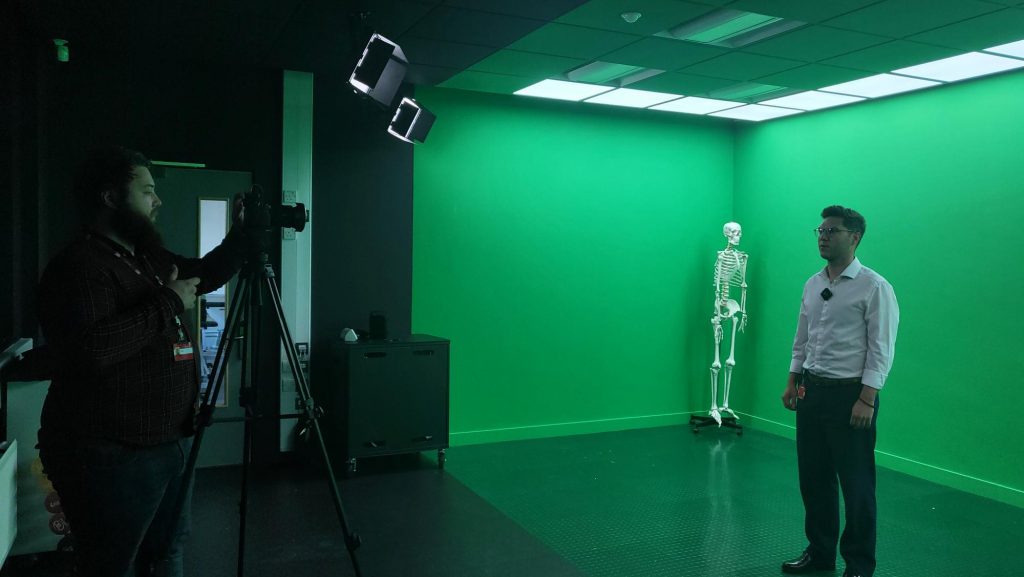
If you’re not already familiar with it, the Green Screen room (R209) is a fully-equipped and bookable recording room, fitted with state-of-art cameras and lighting. As the name suggests, the walls and flooring are green – this allows the imaging software to replace the green background with a different backdrop of your choice.
Edward has been putting this to good use in his Sport and Exercise courses, recording demonstrations of staff and students using sports and therapy equipment, as well as asynchronous lecture videos, assessment launches and synchronous live Teams lectures. The Green Screen room has also been used to facilitate community engagement through the Staffordshire University Sports Therapy Clinic (SUST).
The TILE team have been supporting Edward in spreading the word to colleagues across the university about this highly useful (and user-friendly) resource so that more people can benefit from it. As well as using the room for demos and live or recorded lectures, we are inviting you to think of other ways it could be used to enhance your courses – for example, to allow your students to create video portfolios of their practical work for assessment.
Making the room user-friendly
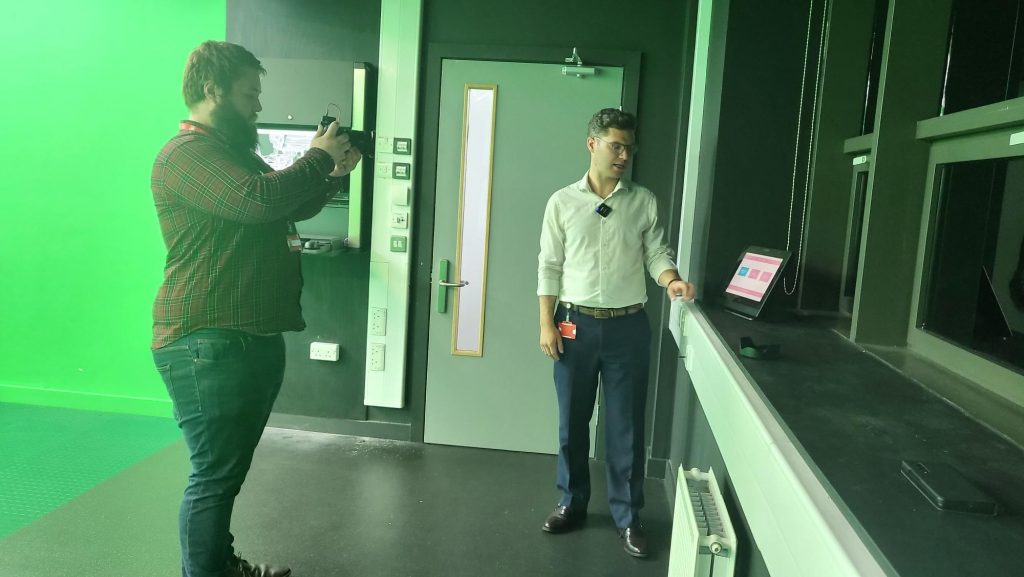
A lot of work has been done to make using the room as intuitive as possible, to allow all staff to take advantage of this innovative tech, regardless of your confidence or experience with recording. An important part of this is the simple touch screen interface you see as soon as you enter the room, from which you can tap a couple of buttons and get started immediately, without needing to play around with complicated lighting and camera settings.
Here’s a brief overview of how it all works:
When you enter the room, tap the interface panel immediately to your left (as shown on the right of the photo above). You’ll be given a choice of three pre-sets on screen:
- Asynchronous lecture recording – if you choose this and stand in the centre of the room facing the ceiling-mounted screen and camera, you can appear as just your head and shoulders in the corner of the screen, presenting a slide show that will appear behind you (more on this shortly)
- Synchronous (live) Teams lecture – if you choose this option, it will connect to a Teams meeting on the main computer in the room
- Practical demonstration – if you choose this option, the camera will zoom out to take in the full room and record you walking around the room giving demonstrations on any equipment you choose to bring in
The next step is to sign in to your university account on the main computer (shown on the left of the photo above). Open whatever you’d like to have as your backdrop (e.g. your lecture slides) or the Teams link for your synchronous lecture. The software will automatically detect it and display it for recording.
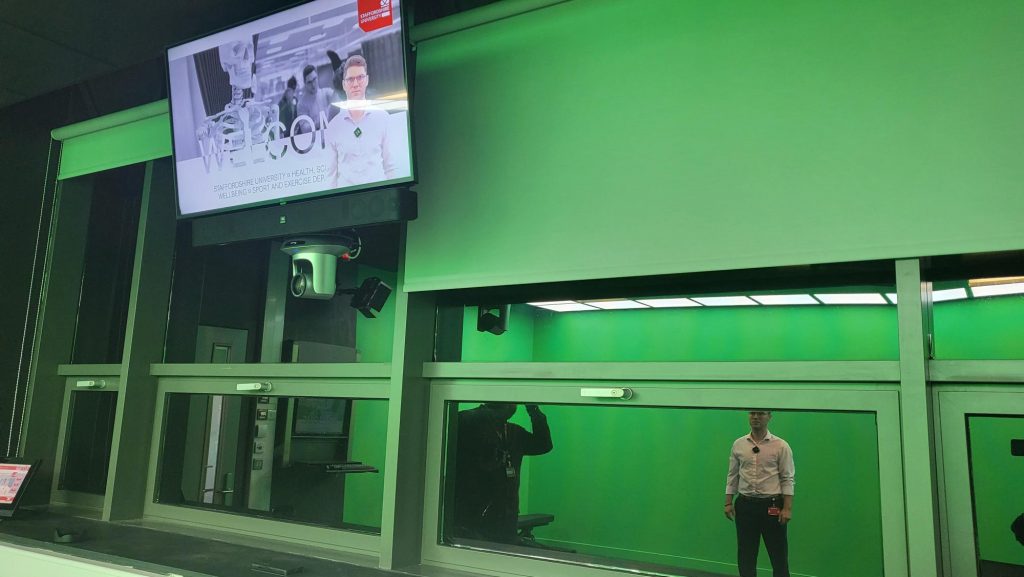
Stand in the centre of the room and check that you’re happy with the position and lighting you can see on the screen above you. If you do need to make any adjustments (for example, if you’re a little taller or shorter than the pre-sets account for), you can do this from the interface panel with a couple of simple taps. Then, from the panel, tap to start recording. An indicator light hanging above you will turn red to show that recording has started (and will turn green when you stop it again, also from the interface panel).
When you’ve finished recording, remove the USB memory stick from the wall below the interface panel and copy over your file to your device, replacing the memory stick when you’re done.
And that’s it!
Lecture capture integration
TILE’s resident lecture capture expert, Simran Cheema, was on hand to explain how you could upload whatever you record in the Green Screen room directly to your VLE using lecture capture software such as Panopto. Simply open up one of your Blackboard modules on the main computer, and create a Panopto LTI link wherever you want to upload your recordings. With this link you can record, edit and upload your finished Green Screen session video directly through the lecture capture software interface in a web browser – there’s no need to transfer any files from the memory stick. You can even record and upload your live Teams sessions in a similar way using lecture capture integration in Teams.
Want to find out more?
If you’re feeling inspired to use any of this tech to enhance your teaching, but need some further guidance, let us know at TILEHub@staffs.ac.uk. Or if you’d like to speak to a fellow academic who’s already using the Green Screen room, contact Edward.Stanhope@staffs.ac.uk. If you missed Edward’s presentation “Greenscreen Technology: Create a virtual you, because one of you just isn’t enough” at the recent Learning and Teaching Festival, you can hear him talk about his work at the upcoming TILE Conference on 14th July.