Blackboard best practice 2 – Troubleshooting common issues

This is a short guide focusing on four common Blackboard issues that we often get asked about in the TILE Hub. Each has a fairly simple solution, so you can save time by knowing the fix for each issue…

1.      My module keeps disappearing

This is something we come across a lot in the TILE Hub, and the solution isn’t always immediately clear.

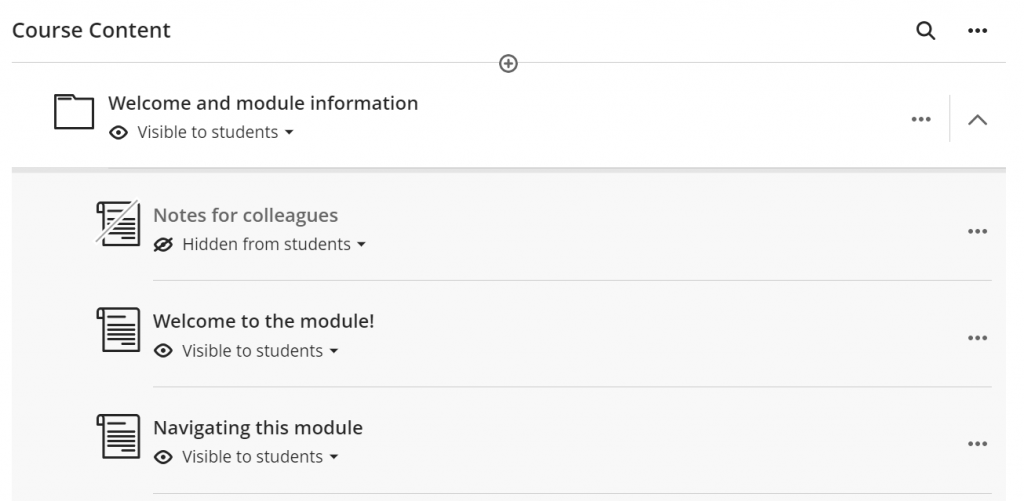
The hallmark sign of this error is when you make your module available in Blackboard, but every day it reverts to being “private” again, so your students can’t access it.

The Solution

To solve this issue, you just need to log in to the Blackboard Management Tool (BBMT). Search for your module using the search box on the left and then select “Make Available”. This may take up to 24 hours to go through but can be as quick as 30 minutes. We have a video guide to help you with this below:

2.      I’ve setup the MS Teams integration but it keeps giving me an error

Since the departure of Blackboard Collaborate in November 2023, more staff are using Microsoft Teams for their online delivery.

When adding the Teams integration in their Blackboard modules, people have reported experiencing one of two issues, caused by:

  • Adding the Teams integration via the Content Market (don’t do it this way)
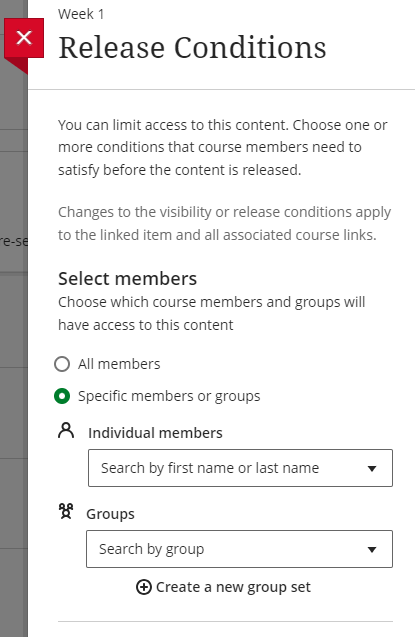
  • Adding it via the menu on the left (which is the right way), however, they have previously used the “Student Preview” feature, causing a preview user to be on the module. This can cause an issue with the Teams integration as it searches for a user that doesn’t exist.

The Solution

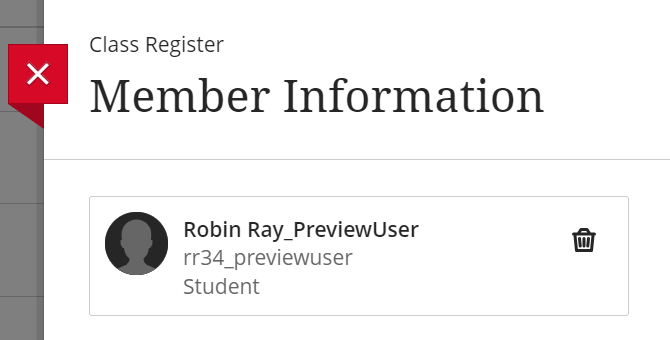
The fix for this is rather quick and easy. Open the Class Register in the Blackboard module, find the “PreviewUser” (there may be more than one), click the three dots next to them and choose “Edit member information”, then remove them from the module with the small bin icon.

Once you have done that, add the Teams integration again using the link at the bottom of the left hand menu and it should work fine:

If you are still experiencing issues, there may be something else causing a problem so it is worth contacting Digital Services at CallDesk@staffs.ac.uk

3.      The Gradebook view isn’t what I’m used to / isn’t very useful

If you’re still relatively new to the Blackboard Ultra Gradebook, having previously used Blackboard Original, then the default view might feel rather strange.

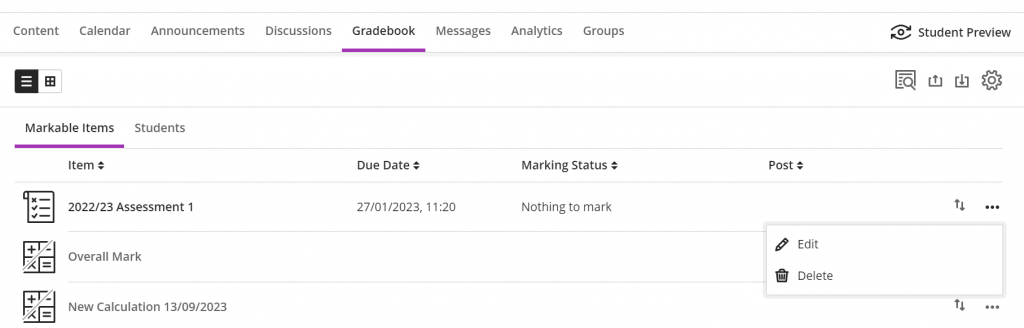
By default, the Gradebook will display all of your assessments and assignments in a list. You can click on each one to go into it and view the individual students’ submissions.

The Solution

However, if you want to see a view more akin to Blackboard Original, that can be achieved by clicking the grid icon in the top right of the Gradebook:

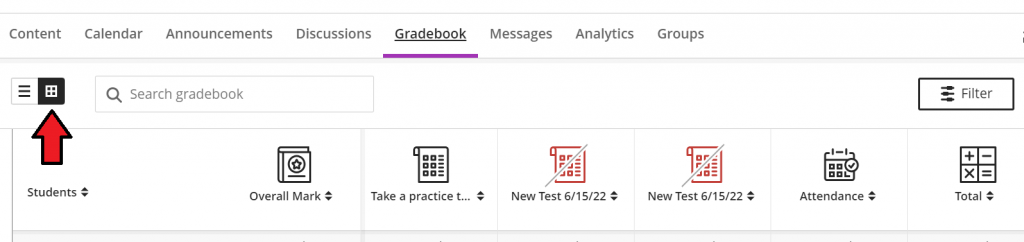
This will give a view a lot more similar to the one in Blackboard Original.

4.      I want to see when students last accessed Blackboard and how much time they’ve spent on the module

A wonderful part of Blackboard Ultra is that a lot of the functionality of Blackboard Original is still available – it’s just the user interface that has changed. So familiar features might be in a different place than you’re used to.

This is true for the student activity data. This is now available in the “Analytics” tab on the toolbar across the top of the module.

The Solution

By selecting the three horizontal lines under “Course Activity” in the Analytics tab, you can see the students’ overall marks and how many days its been since they’ve last accessed your module:

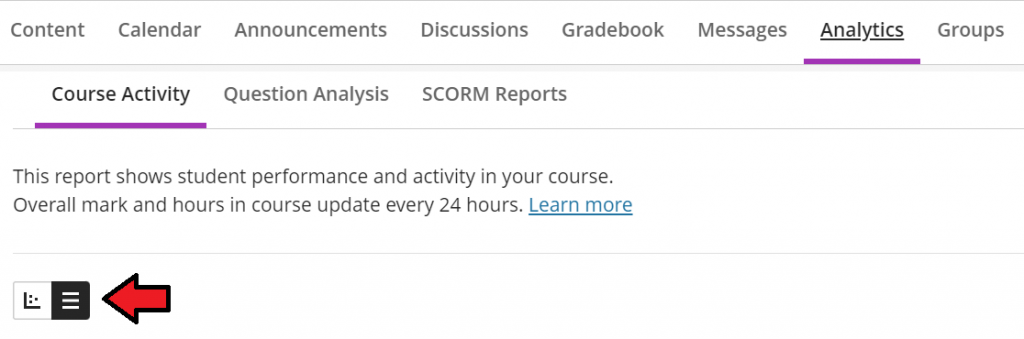
However, clicking on a student’s name and selecting “Student Activity” in the grey bar across the top will allow you to see a more individual look at the student’s activity. Here you can also select the graph icon in the top left to view the student’s activity compared to the module average.

As always, you can get in touch with the TILE Hub if you need any support with using Blackboard Ultra, either by emailing TILEHub@staffs.ac.uk, or by posting on our dedicated “Blackboard” Teams channel.

Blackboard best practice 1 – Improving the student experience

The Blackboard Ultra Virtual Learning Environment (VLE) is the main way for students at Staffordshire University to access their course materials online. Each module of every course has its own space on the VLE, populated with resources by the module instructors.

No matter how high the quality of the learning materials, students need to be able to find what they need easily. Used correctly, the technology can aid accessibility, but without a bit of careful setup it can also be a hindrance.

Here are four things you can do as an instructor or module leader to make sure your students have a more positive experience navigating your Blackboard modules.

1)    Fill in the Welcome folder documents

Each Blackboard module for the 2023/2024 academic year has been created from a Blackboard Ultra template specifically designed for best practice and tailored to suit your subject area. One important part of this template is the “Welcome and module information” folder, containing documents guiding you to give your students the information they need.

Before each module is made available, each document in the Welcome folder should be filled in and set to be “Visible to students”. That way, students always know where to look for the key information, as it will always be in the same place in every module they study.

2)    Keep things tidy in folders, subfolders and learning modules

When adding learning materials and assessments to your Blackboard Ultra module, there are a few things you can do to make them easier to navigate to:

  • It’s a good idea to have separate folders for learning materials and assessments – you might even have these set up already from the template. Click inside the relevant folder when you need to add some resources or create a new assignment.
  • Instead of adding a huge list of different resources to the learning materials folder that students will have to scroll down through, create some meaningful subfolders to sort them into. For example, if you usually release your materials on a weekly basis, you could have subfolders named by the week or date. Or it might fit your module better to arrange the resources by topic, so name your subfolders with each topic covered. You can move the subfolders around too so they follow a logical order inside the main folder.
  • Make sure you add descriptions to your folders and subfolders to tell students what they can find inside them. To do this, click on the three dots to the right of the folder and choose “Edit”, then fill in a description and “Save”.
  • Within Blackboard Ultra there are special folders called “Learning Modules” with a few extra features in the “Edit” panel. Ticking the “Forced Sequence” box means that students must access the materials in the folder in the order that you set them – they must open the first item to unlock the second, and so on. You also get the option to add an image to learning module folders to make them stand out better on the screen:

3)    Check the Gradebook for old assessments

Blackboard Ultra has a number of ways to import or copy existing content into new modules to save you time. However, you need to be very careful when copying from old modules that you don’t accidentally import old assessments with long-expired deadlines. When this happens, your current students might be notified that they have overdue work – when in fact they haven’t yet been set those assessments. It can be confusing and stressful for all involved.

The best way to avoid this is to check in the “Gradebook” tab under “Markable Items”. The only things listed there should be assignments you’ve created for this year’s module, and you can check their deadlines in the “Due Date” column. If you find any that shouldn’t be there, click the three dots to the right of them in this view and choose “Delete”.

4)    Use the Release Conditions panel

You might not want your learning materials and assessments visible to all students at all times. For example, you might want to release subfolders of resources week by week, or set different assignments to different groups of students. You might also have to create a new assessment submission point for students who are resitting, but don’t want to confuse the students who aren’t.

To help with all these situations, you can use the “Release Conditions” panel on any content in your module – folders, documents, assessments etc. To open this panel, click in the drop-down menu under the name of the item, and choose “Release Conditions”.

First you are given the choice to make the item visible either to “All members”, or to choose individual students or groups to make it visible to. (If you’ve created a “Student preview” version of yourself, you can choose that student preview user here if you want to check what the item looks like to students before you release it to everyone.)

You can set up groups from this menu if you haven’t already done so by choosing “Create a new group set”.

The other part of the panel allows you to “Set additional conditions” such as a date and time to make the item visible, as well as a second date and time to hide it again. You can even select “Performance” and only make the item available to students who have scored a certain amount on a previous assessment.

A little goes a long way

Spending an hour or so to make these tweaks and checks to your module before you start to teach can really improve the digital learning experience for students. If you need any support with Blackboard Ultra, or would like someone to check over your modules before you make them available to students, please get in touch with the TILE Hub on TILEHub@staffs.ac.uk, or through our Blackboard channel in Teams.